Have you ever wanted to explore how enterprise-grade cloud hosting works without reaching for your wallet? In this guide, I’ll show you how to create a fully functional WordPress website on Microsoft Azure.
This walkthrough is strictly for demonstration and learning purposes. We will be leveraging Azure’s ‘Free Tier’ services, which provide a perfect, cost-free sandbox to experiment with CMS deployment, database configuration, and cloud architecture. Please note that this configuration is not intended for production traffic, as it lacks the high availability and performance features required for live business sites.
Table of Contents
- Prerequisites & Cost Overview
- Step 1: Sign in to Azure portal
- Step 2: Search for WordPress in the Marketplace
- Step 3: Fill basics details like name, resource group, app service plan.
- Step 4: Choose WordPress Hosting Plan
- Step 5: Configure Site Credentials and Language
- Step 6: Add-ins tab
- Step 7: Review + Create
- Step 8: Deployment in-progress
- Step 9: Access Your WordPress Site
- Step 10: Cleanup and how to avoid charges
- Takeaways
Prerequisites & Cost Overview
Before you begin, ensure you have an active Azure subscription. The following table outlines the components used in this demo and their associated costs under the Azure Free Account offer.
| Component | Service | Cost / Status | Notes |
| Azure Subscription | Any valid Azure Subscription | Free to create | Required to access the portal. |
| WordPress Hosting | Azure App Service (F1 Free Tier) | Always Free | Limited to 60 CPU minutes/day. Ideal for demos. |
| Database | Azure Database for MySQL – B1ms | Paid / Free | Free with Azure Free Account (B1ms instance). |
| Pricing Check | Azure Pricing Calculator | N/A | Check this tool for post-trial cost estimates. At the time of writing this post, it is $12.4/month. |
⚠️ Important Notice: While the App Service F1 tier is “Always Free,” the MySQL database included in this setup is part of a 12-month free trial. After 12 months, or if you exceed the free monthly limits, you will need to pay the charges.
Step 1: Sign in to Azure portal
Navigate to portal.azure.com and log in with your Microsoft account credentials to access your centralized cloud management dashboard.
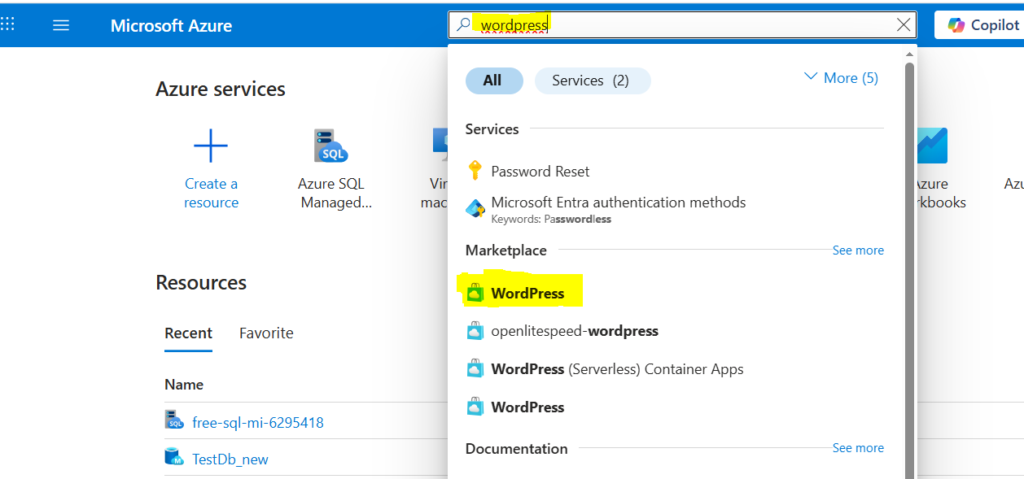
Step 2: Search for WordPress in the Marketplace
In the global search bar at the top of the Azure portal, type “WordPress” and select the official WordPress app from the Marketplace results to begin the automated deployment process.
Step 3: Fill basics details like name, resource group, app service plan.
Enter the essential configuration for your deployment: provide a unique name for your WordPress site, select or create a new Resource Group to organize your resources, and choose an App Service Plan. Be sure to select the F1 (Free) tier to ensure your project remains within the limits of the Azure free offer.

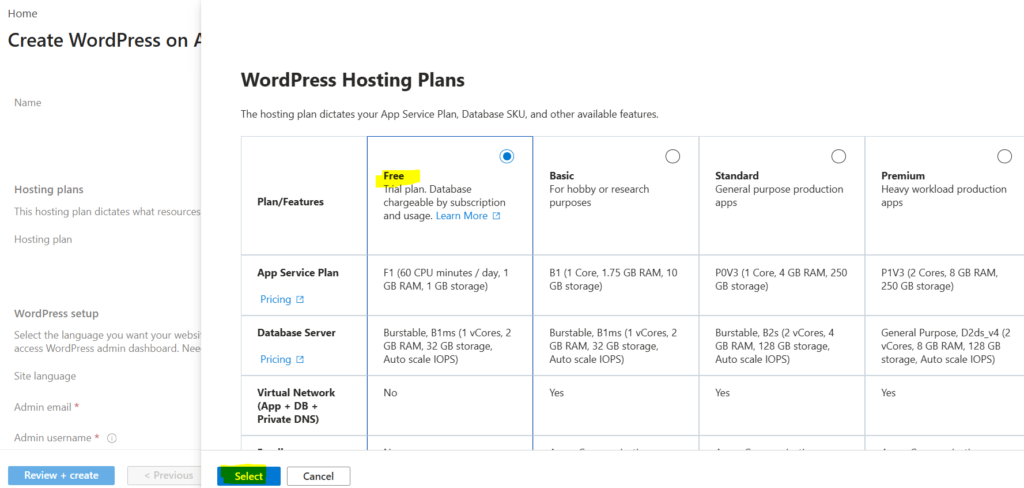
Step 4: Choose WordPress Hosting Plan
Click on Change Plan and choose Free plan.
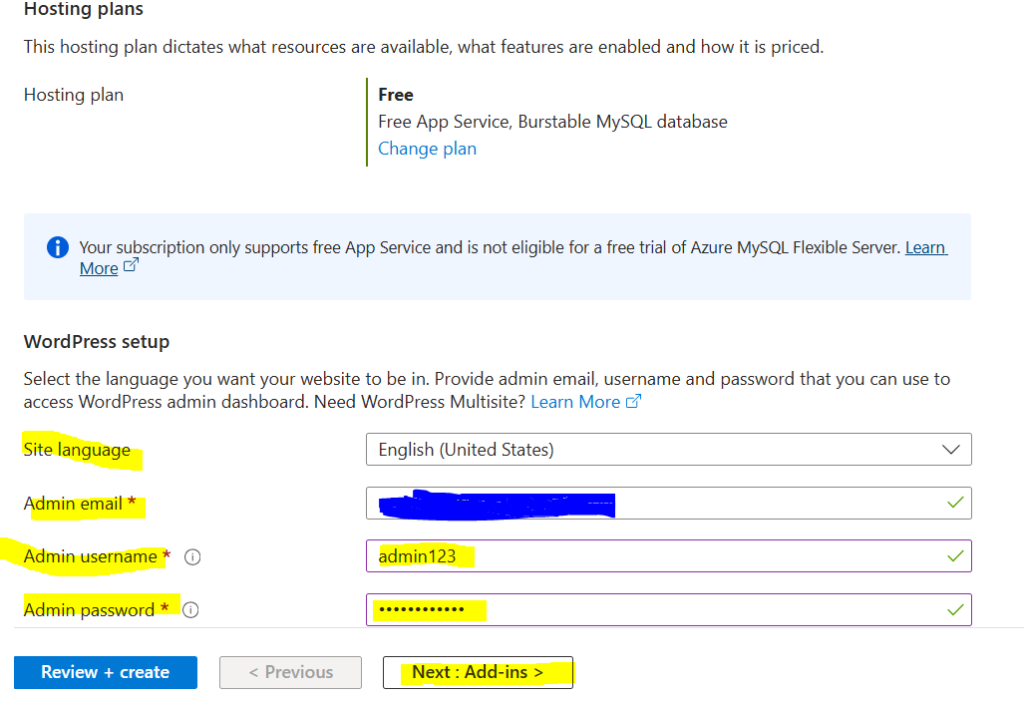
Step 5: Configure Site Credentials and Language
Once your hosting is set up, you will need to define the administrative access for your new website. Enter your preferred Administrator Username, Password, and Email address, which you will use to log in to the WordPress dashboard after the deployment is complete. Additionally, select your Site Language from the dropdown menu to ensure your blog interface is localized exactly how you want it.
For more information, refer Quickstart: Deploy a WordPress site on Azure App Service – Azure App Service | Microsoft Learn
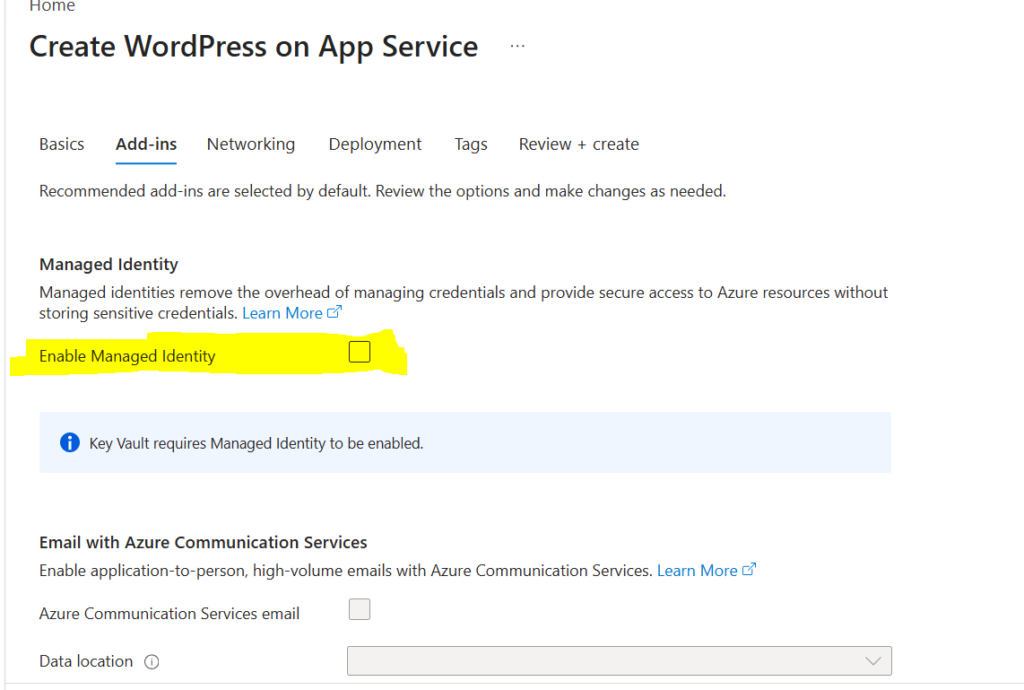
Step 6: Add-ins tab
Uncheck the managed identity option as we are not interacting with other resources in Azure for this demo.
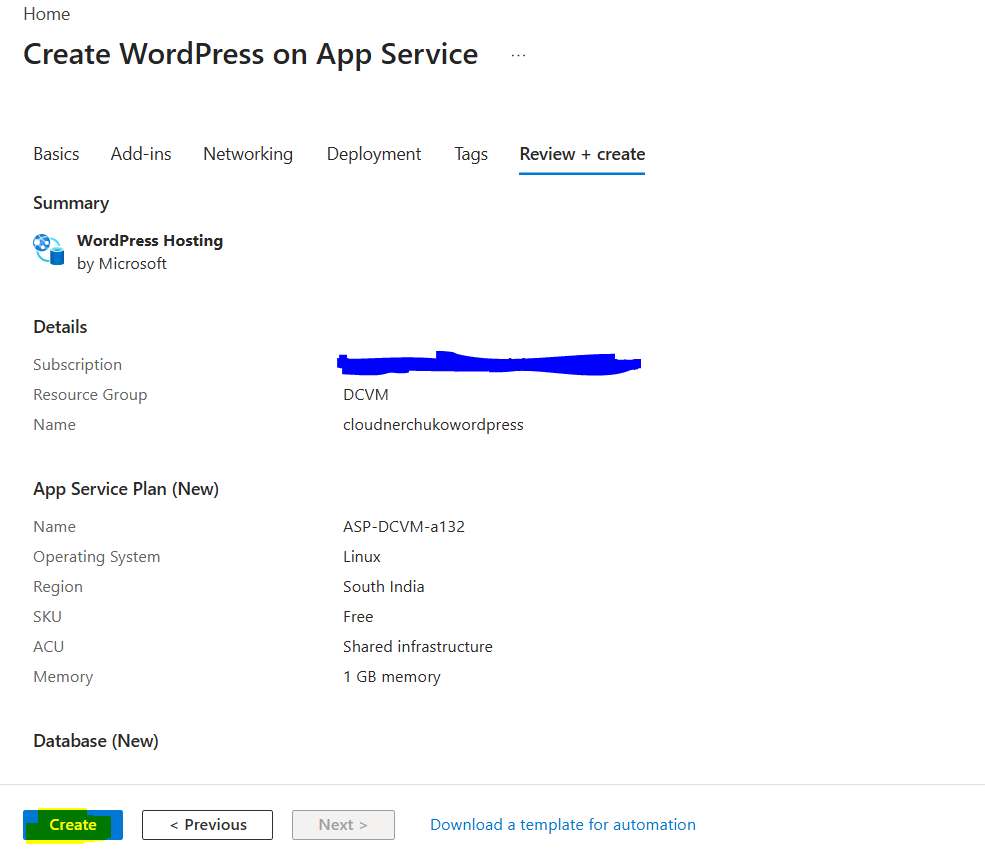
Step 7: Review + Create
Proceed to create the resource as other tabs not configured for Free tier.
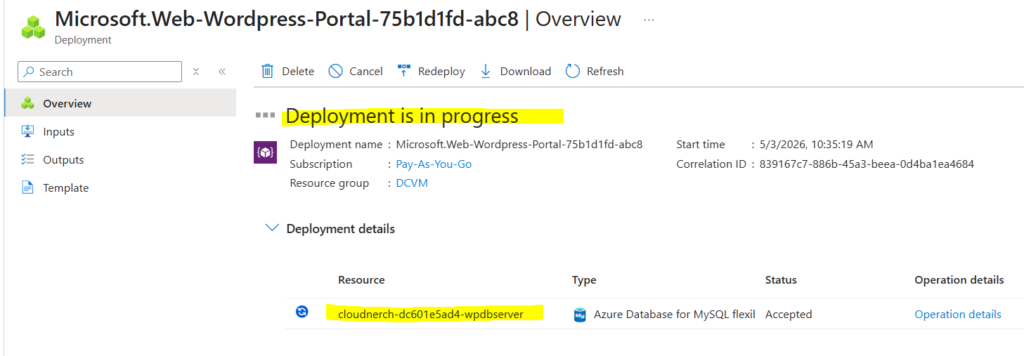
Step 8: Deployment in-progress
Here, the deployment is in progress once you create the resource. Kindly wait for 5 – 10 minutes to see the resource.
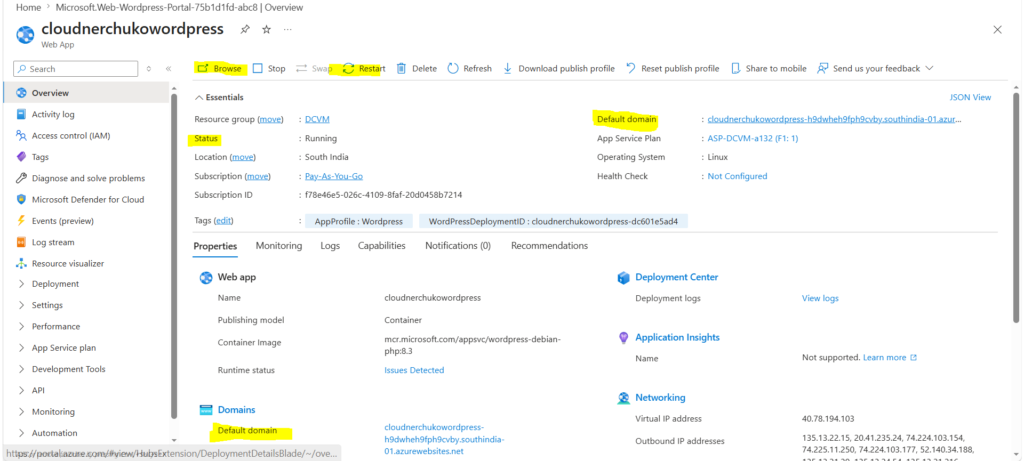
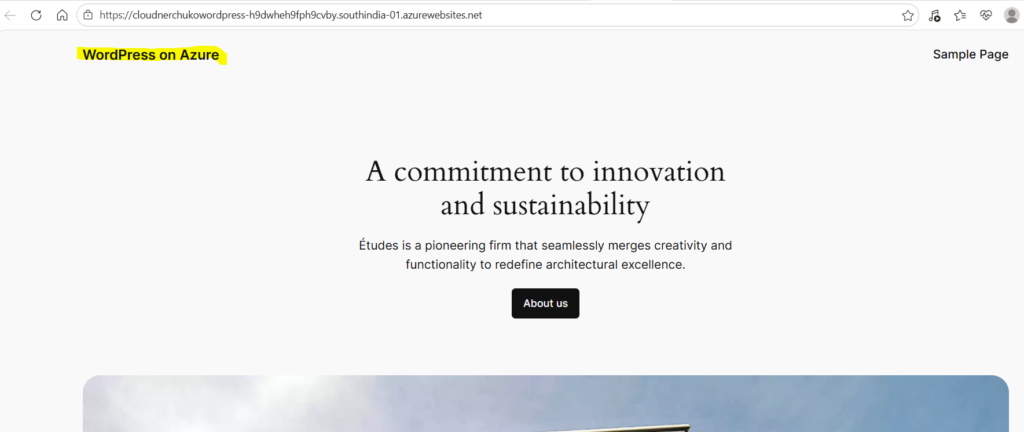
Step 9: Access Your WordPress Site
Once the deployment is complete, navigate to the Overview page of your new Web App in the Azure portal. Locate the Default domain link on the right-hand side clicking this URL will launch your live WordPress website. Additionally, you can click the Browse button in the top menu to quickly open your site in a new browser tab and begin the final WordPress configuration.
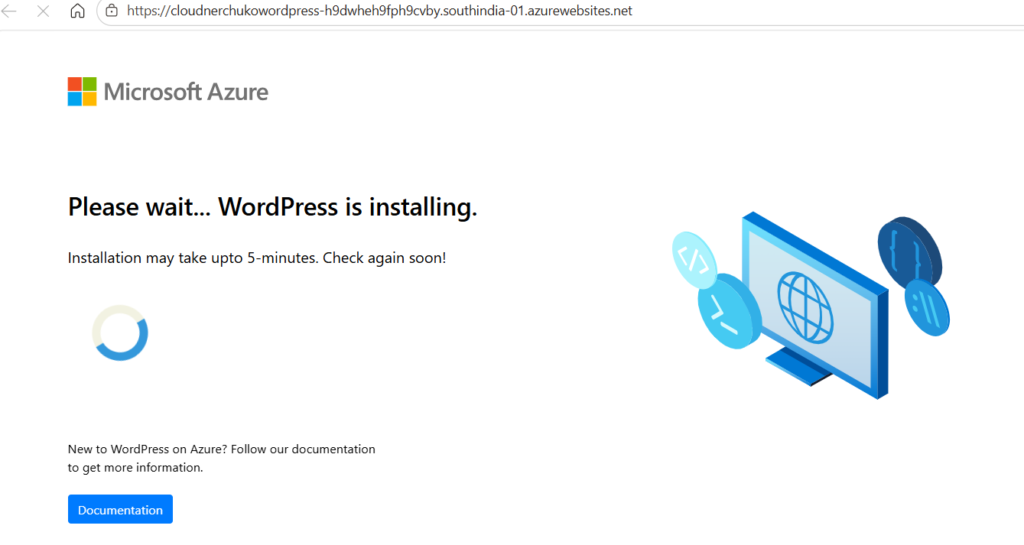
WordPress Installation in progress
When you launch the URL, you will see the below screen as WordPress is installing. Kindly wait for 10 -20 minutes to see the sample WordPress website.
Refresh to see the Website page
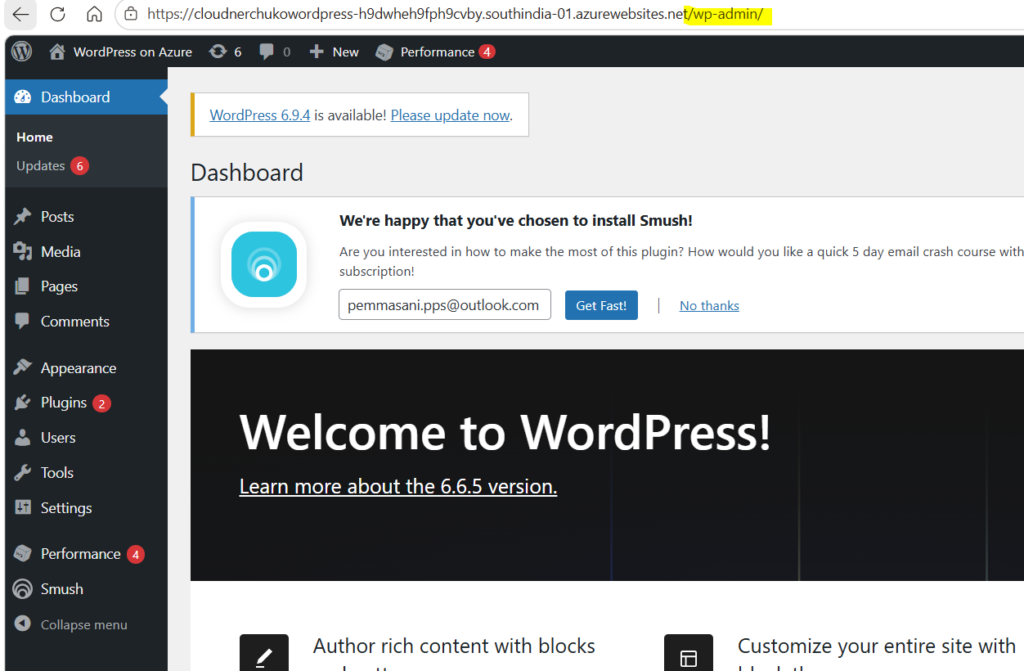
Access the Admin dashboard of WordPress
To begin customizing your new site, you need to enter the administrative area. Open your website’s URL in a new browser tab, append /wp-admin to the end of the address (e.g., your-site-url.azurewebsites.net/wp-admin), and press Enter. Once the login page loads, enter the Username and Password you created during the deployment process to gain full control of your WordPress dashboard.
Step 10: Cleanup and how to avoid charges
“Since this is a demo environment, you don’t want to leave these resources running indefinitely. Once you have finished your testing, follow these steps to delete everything at once:
- Navigate to your Resource Groups in the Azure Portal.
- Select the Resource Group you created for this project.
- Click Delete resource group at the top.
- Type the name of the resource group to confirm and click Delete. This will remove all associated services, including the MySQL database and the App Service, ensuring no further costs are incurred.”
Takeaways
Congratulations! You have successfully navigated the steps to deploy your own WordPress website on Azure. That is a significant accomplishment, and you now have a live, functioning site ready for your content.
I would love to hear your feedback on the process: Did you find the steps simple to follow, or was there a particular part that felt challenging? Please leave a comment and let me know how your experience was and your insights will help make this guide even better for others!
You can also reach out to me if you have any questions while creating WordPress website using Azure Cloud.
For more blogposts, refer CloudNerchuko.in