
In this guide, we will walk through how to seamlessly integrate Microsoft Entra ID (formerly Azure Active Directory) with your SQL Managed Instance using the SSMS tool.
Just follow the below steps to connect to SQL MI server.
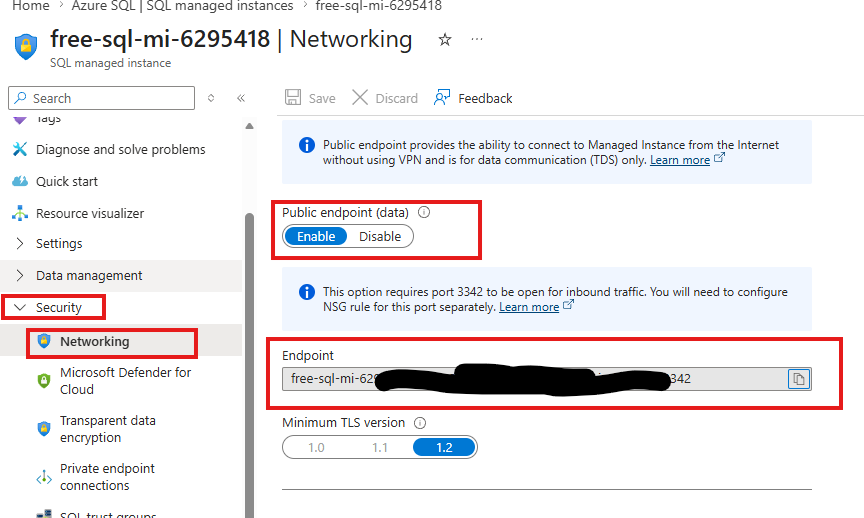
Step 1: Copy the SQL MI Hostname from Azure Portal
Log in to the Azure Portal and navigate to the Networking section on the left-hand menu. To connect to a SQL Managed Instance deployed within a virtual network from an external environment, ensure that the Public endpoint option is enabled.
Step 2: Login to SSMS studio
To connect to your SQL Managed Instance server, you need to install SSMS tool onto your machine.
If you don’t have the SSMS installed, you can download 20.2 version from the below link.
Release Notes for SQL Server Management Studio (SSMS) 20 | Microsoft Learn
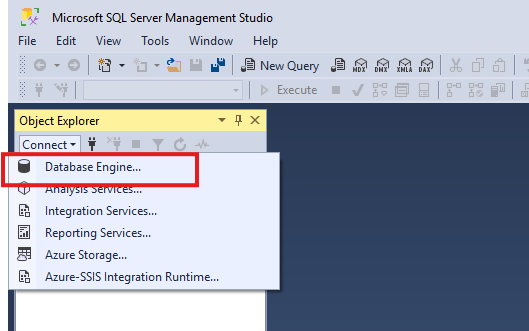
After opening the SSMS tool, click on Connect -> Database engine as shown in the below image.
Step 3: Fill the details to connect using Entra ID
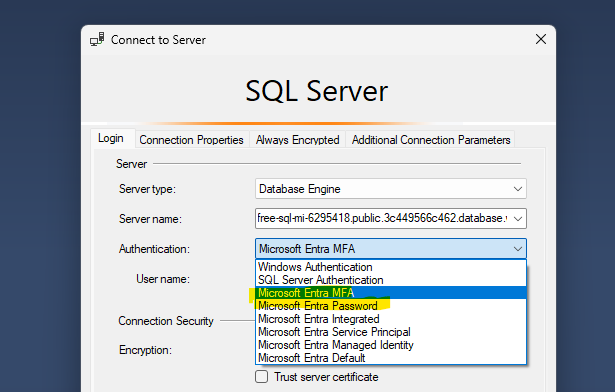
Servername: Paste the Server name copied from Azure SQL MI in Azure Portal.
Authentication: Choose Microsoft Entra MFA or Microsoft Entra Password
MFA (Multi-Factor Authentication): Requires you to approve a verification prompt or enter a security code sent to your device to authorize and establish a connection to the SQL Managed Instance.
Entra Password Authentication: Simply requires you to log in using your Microsoft Entra ID email address and password.
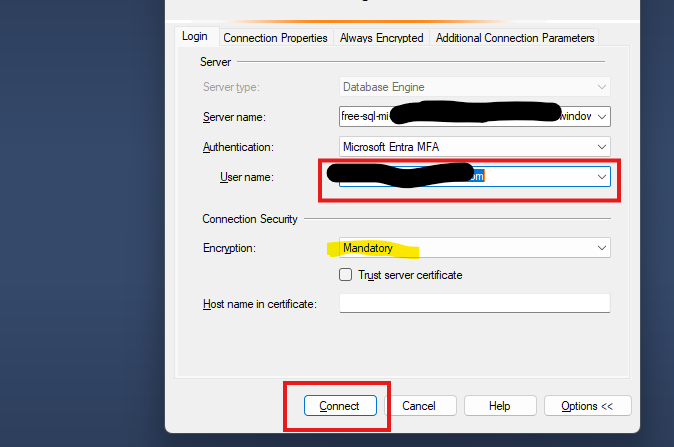
Username: Enter the email id or username
Encryption: Keep it Mandatory
Click on connect button.
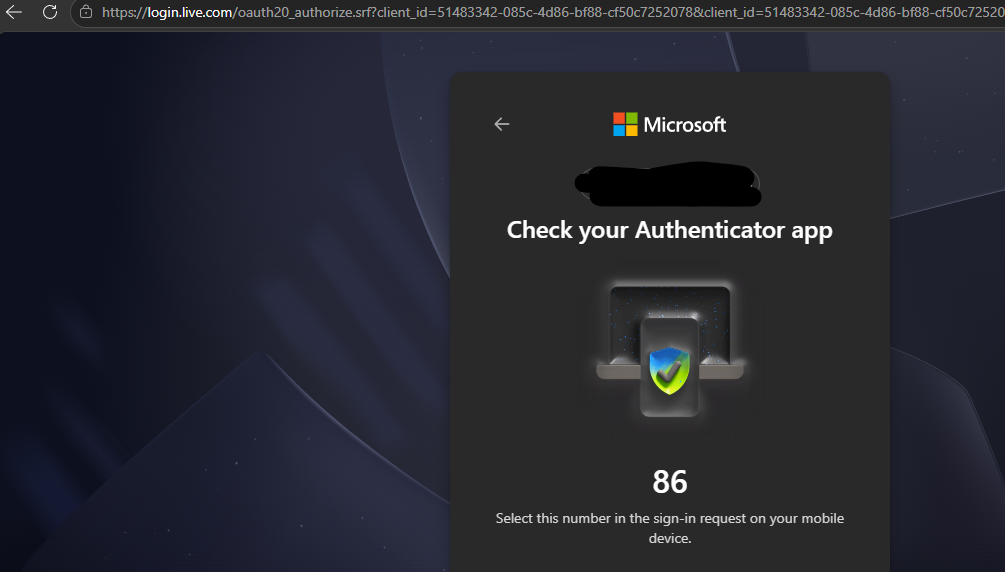
After clicking Connect, a new browser tab will open prompting you to authorize the connection using Multi-Factor Authentication (MFA). Return back to SSMS once the authentication is successful.
Step 4: Access the SQL MI Server
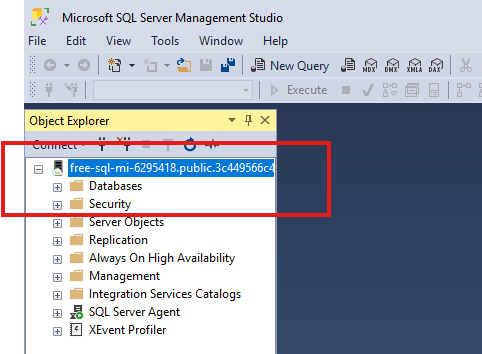
Once the connection is successfully established via the public endpoint, you can begin exploring your SQL Managed Instance, managing databases, and executing queries.
Summary & Next Steps
In this guide, we covered how to successfully configure and connect to your Azure SQL Managed Instance using Microsoft Entra ID authentication. Here is a quick recap of what we accomplished:
- Admin Configuration: Set up the Entra ID administrator in the Azure Portal and verified the setup with the green checkmark.
- Network Security: Enabled the Public Endpoint under the Networking section to allow external connections to the instance secured inside the virtual network.
- Authentication Choice: Explored the differences between standard Entra Password login and the more secure Multi-Factor Authentication (MFA) process.
- Successful Connection: Authorized the connection via a new browser tab using MFA and successfully accessed the SQL MI databases.
You are now all set to securely manage your databases, execute scripts, and leverage the power of Entra ID integration!
Let’s Connect!
If you ran into any issues, have questions about the setup, or want to share your thoughts, I’d love to hear from you:
- Drop a comment right down below this post.
- Connect with me on LinkedIn to stay in touch.
For more technical blogposts, visit CloudNerchuko.in