
Running SQL Server on Linux is easier than ever thanks to Docker. In this guide, I’ll walk you through deploying a spot instance VM on Azure, installing Docker, and running SQL Server 2019 Developer edition instance inside a container.
The screenshots from the Azure Portal and command prompt will help illustrate the process. I tested the process and shared the details in this blog post.
A quick word on security before we connect: I’m leaving Port 22 wide open to the internet here because this is just a temporary Spot instance for a quick Dev/Test setup. If you leave Port 22 open on a production machine, it will be found by automated bots and brute-forced within minutes. Always lock down your SSH access to your own IP address when working with real environments!
Check Azure Spot VM pricing here.
Pre-requisites:
- An Active Azure Subscription.
- Create a low-cost Ubuntu 22.04 LTS Spot Azure Virtual Machine. (Around $17/month)
- Working Laptop with SSMS tool installed for GUI interaction with SQL Server.
Create a Spot Ubuntu VM
In the Azure Portal, go to Virtual Machines → Create VM.
Fill the basic details like resource group, vm name, administrator name etc.
Choose Ubuntu Server 24.04 LTS as the image.
Under Pricing options, select Spot instance to save costs.
Configure size, authentication (SSH key or password), and networking.
3 options to execute commands for setting up Docker SQL container
- Execute commands using Azure Cloud Shell using Azure Portal using ssh on port 22.
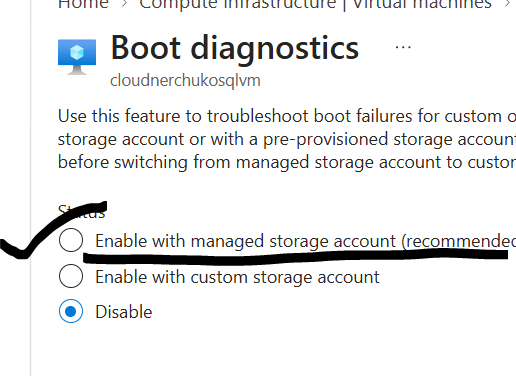
- Enable managed storage account to work from Serial Console under Help section of Azure VM.
- Connect to your Azure VM from your laptop by enabling the necessary network rules (port 22).
Review the cost and create the VM.
Connect to Your VM
Connect to the Azure VM using the command below and any of the methods mentioned above.
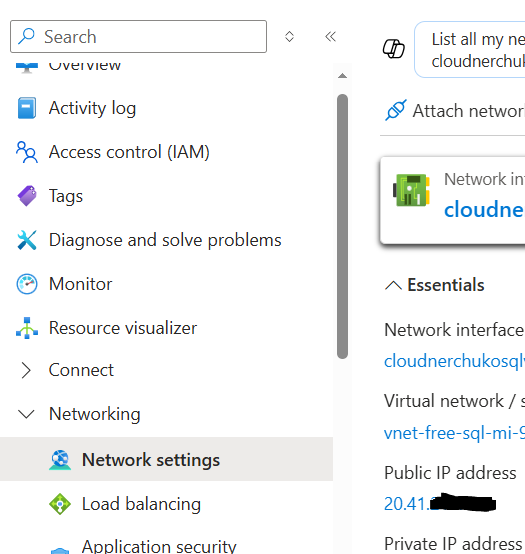
ssh azureuser@PublicIP_or_DNSYou can find the public IP address in the Networking section as shown below.
Install Docker
Run the below commands in the VM.
sudo apt-get update
sudo apt-get install -y docker.ioVerify installation:
sudo docker --versionRun SQL Server in Docker
Pull the official Microsoft SQL Server 2019 image from Microsoft container registry:
sudo docker pull mcr.microsoft.com/mssql/server:2019-latest
Start the container:
# Change the Password to a strong password

sudo docker run -e 'ACCEPT_EULA=Y' -e 'SA_PASSWORD=YourStrong!Passw0rd' \
   -p 1433:1433 --name sqlserver \
   -d mcr.microsoft.com/mssql/server:2019-latest
Run SQL Server in Docker
Pull the official image:
sudo docker pull mcr.microsoft.com/mssql/server:2019-latest
Start the container:
sudo docker run -e 'ACCEPT_EULA=Y' -e 'SA_PASSWORD=YourStrong!Passw0rd' \
   -p 1433:1433 --name sqlserver \
   -d mcr.microsoft.com/mssql/server:2019-latest
Check it’s running:
sudo docker ps
Configure DNS in VM
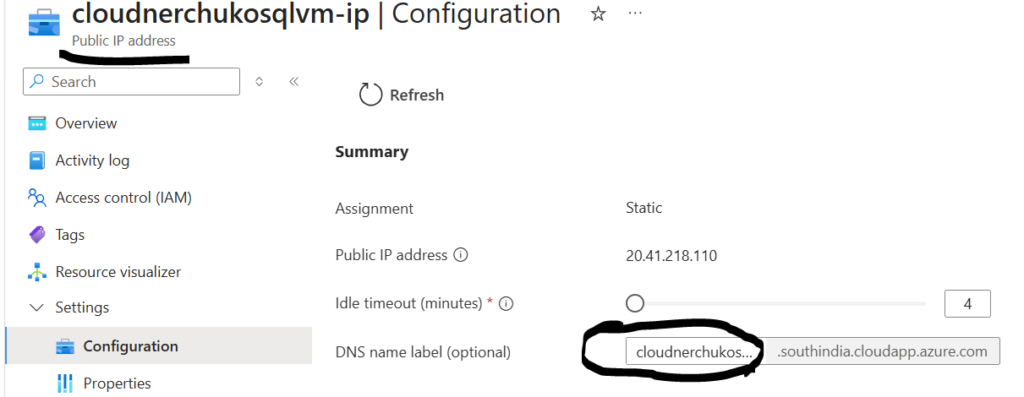
Open the VM’s public IP address resource, navigate to Configuration, and enter your desired DNS name in the box before saving it. Alternatively, you can use your VM name for simplicity.
Configure Networking
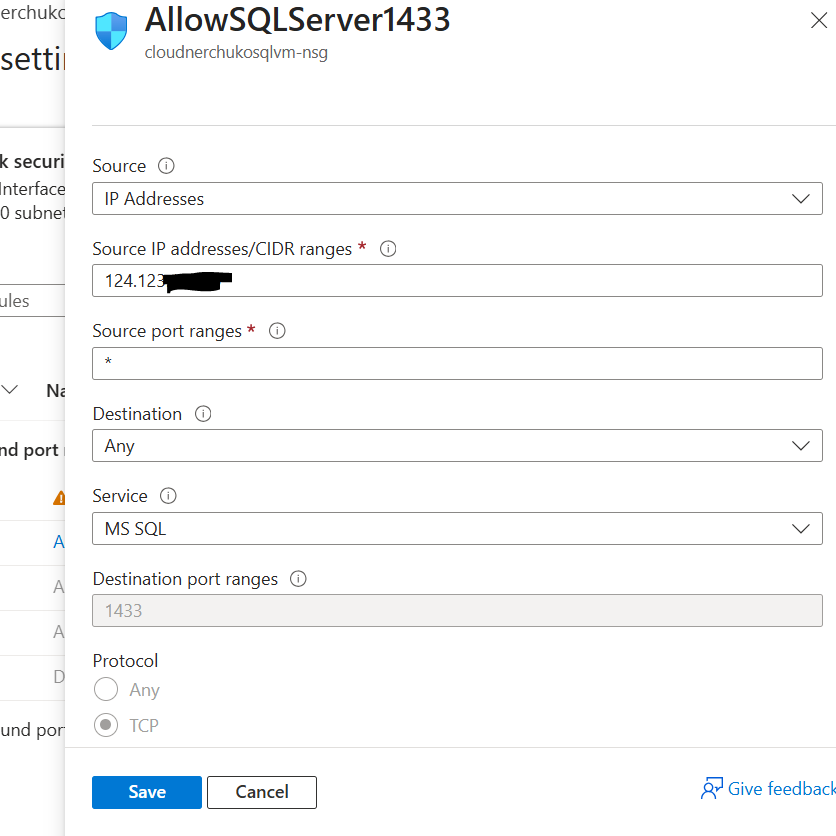
To connect from local laptop using SSMS tool, add a inbound rule in the network security group in the VM.
On your laptop:
Execute curl ifconfig.me from command prompt.
Copy the IP Address and add the inbound rule as shown in the below image. Fill the description and rule name and save the rule. Now, it will allow only your IP address to connect to SQL Server on VM.
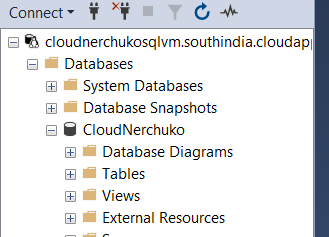
Connect from SSMS
On your laptop:
- Open the SSMS tool and click on the Connect button.
- Server name: Paste the DNS name and 1433. example: cloudnerchukosqlvm.southindia.cloudapp.azure.com,1433
- Login:
SA - Password: YourStrong!Passw0rd
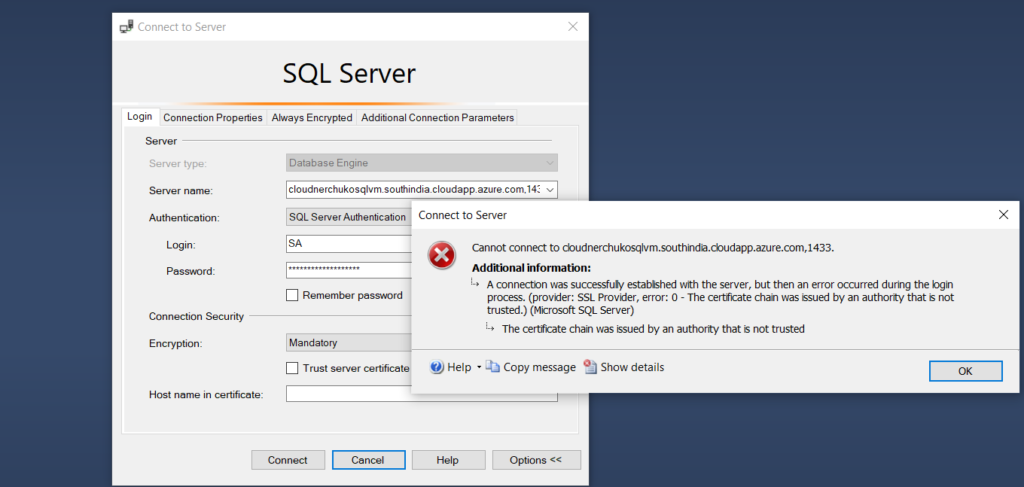
- In Connection Properties, check Trust server certificate to bypass CA errors.
Test with a Database
Once connected, run:
CREATE DATABASE TestDB;
GO
USE TestDB;
GO
CREATE TABLE People (ID INT PRIMARY KEY, Name NVARCHAR(50));
GO
INSERT INTO People VALUES (1, 'Phaneendra');
GO
SELECT * FROM People;
GO
SSMS shows an error if the Trust Server Certificate option isn’t selected.
To resolve this without using an external digital certificate, simply enable the Trust Server Certificate option and connect.
Error message text:
A connection was successfully established with the server, but then an error occurred during the login process. (provider: SSL Provider, error: 0 – The certificate chain was issued by an authority that is not trusted.) (Framework Microsoft SqlClient Data Provider)
For help, click: https://docs.microsoft.com/sql/relational-databases/errors-events/mssqlserver–2146893019-database-engine-error
Server Name: cloudnerchukosqlvm.southindia.cloudapp.azure.com,1433
Error Number: -2146893019
Severity: 20
State: 0
Conclusion
With these steps, you’ve:
- Deployed a cost‑efficient spot VM on Azure cloud.
- Installed Docker and launched SQL Server.
- Configured networking and connected securely from your laptop.
This setup is ideal for development, testing, and learning without high costs. For production, consider a regular VM and a trusted TLS certificate.
Thanks for checking out the blog post! Feel free to drop a comment below if you have any questions.
Also Read
How to Create Linked Servers in SQL MI Using Entra ID
Check Replication status between SQL MI Primary and Secondary